GSXR750 SRAD engine build
Posted: Feb 10th, '16, 21:58
So I’ve finally got around to pulling my old motor out from under the workbench to complete the EFI conversion I had planned a few years back. All of the parts I needed were found, then a decent motor came up so I parked this.
We’ve got to a good point with the current motor having fitted a large volume air tray that uses the bottom of the tank as the lid. Different air tubes to help get the air in as quickly as possible also help out. Most recently I’ve tried 3 different configurations of velocity stacks, these should come into play more with a worked motor!
So the plan with this motor is to convert it and tweak a few bits while I’m at it……..
Going for a mild tune.
• High lift cams, degreed in
• Skimmed head and barrels to get the compression up a bit
• Hopefully Ti bits into the valve area…..
• Machine work to some of the casings to help with spin up & overall weight
• Slight port + polish (intake is pretty much perfect, so just a clean and tidy there)
• Replace any worn out/out of spec parts at the same time
I’m hoping to show the tear down, work, rebuild and the final dyno tuning on here, for anyone interested.
This engine was dyno’d at 110bhp, with stock exhaust, K&N filter and different jets in the carbs. The efi engine in the bike now, completely stock innards (3 valve shims changed to bring back into spec), put out 128bhp after a full map. This is with a full stainless system, air tray/tubes and PC3.
Throwing it out there now, my aim is 136bhp upwards
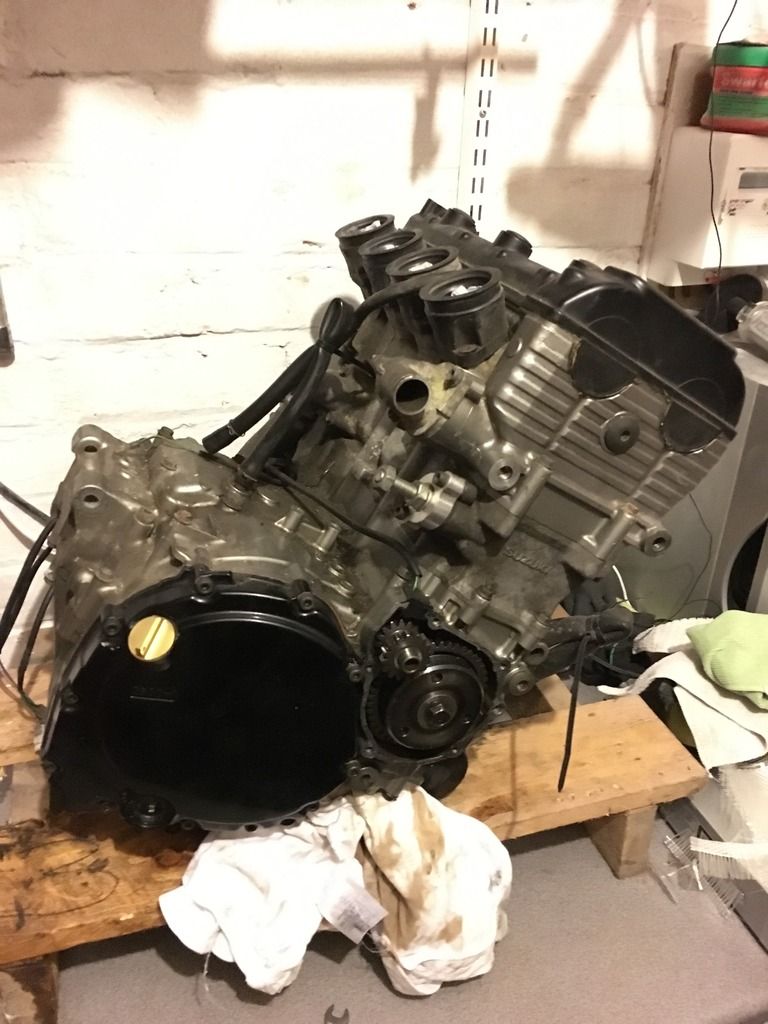
Rather dirty, in need of a good clean on the outside for sure! There is anodised gold on there and there will be more once I'm done
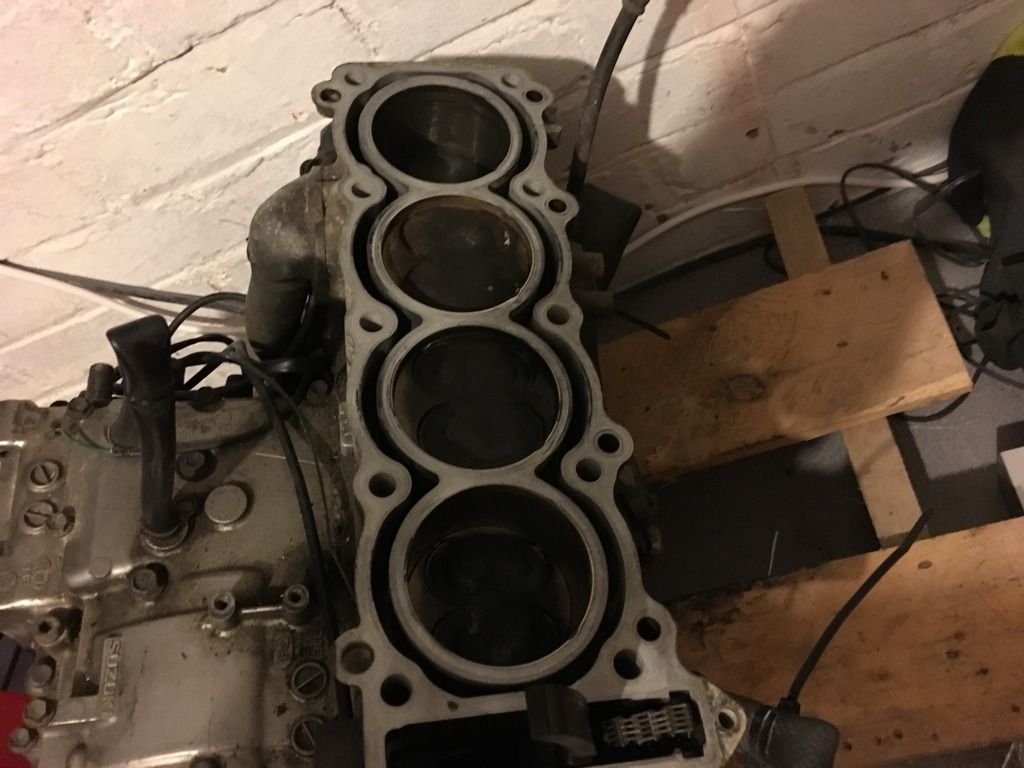
A few bolts later and pistons are hanging out the top of the engine, intentionally though……
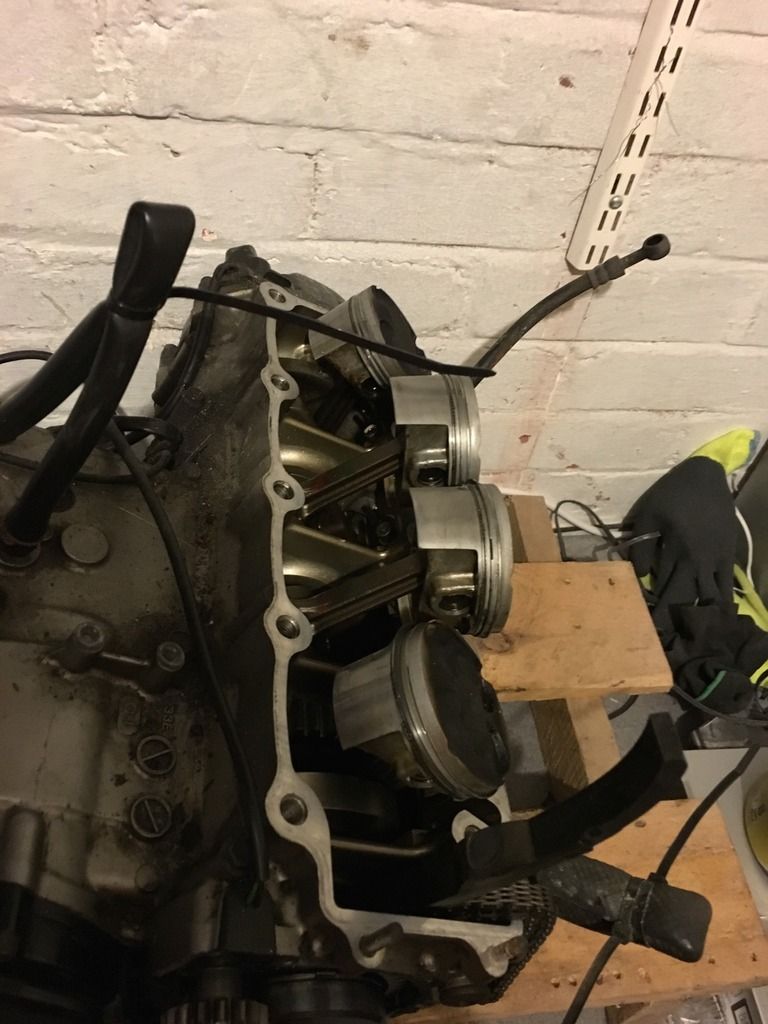
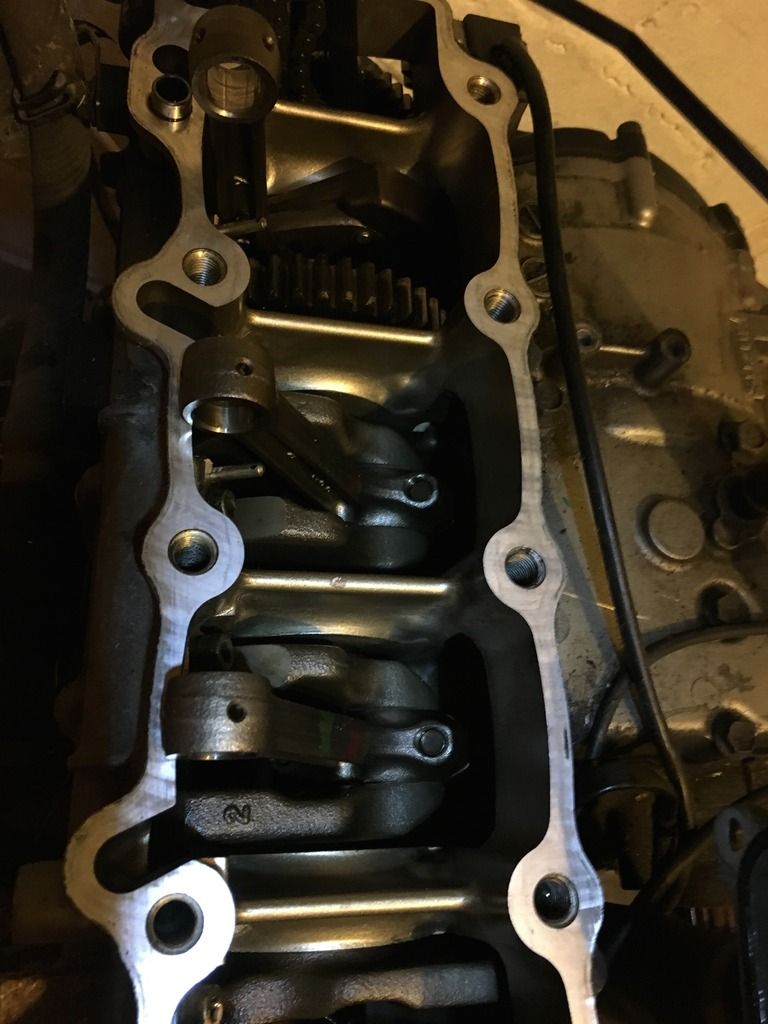
You can see a round indentation on the back of the cam chain guide, from the tensioner, meaning the guide will need replacing because this is a weak spot now.
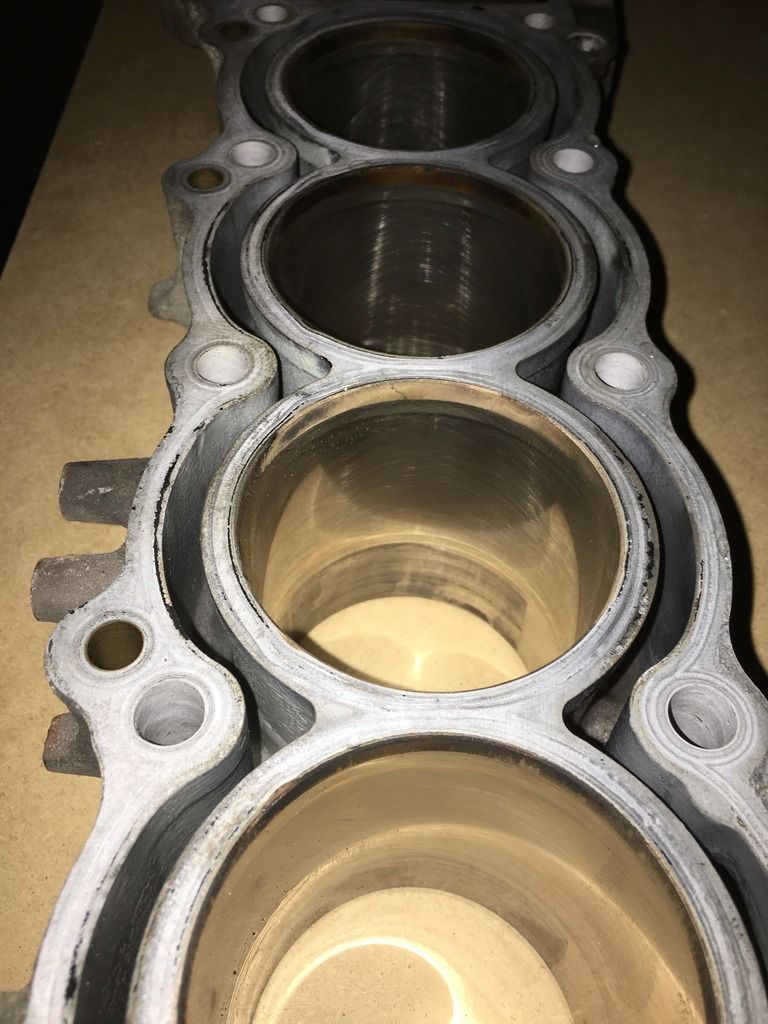
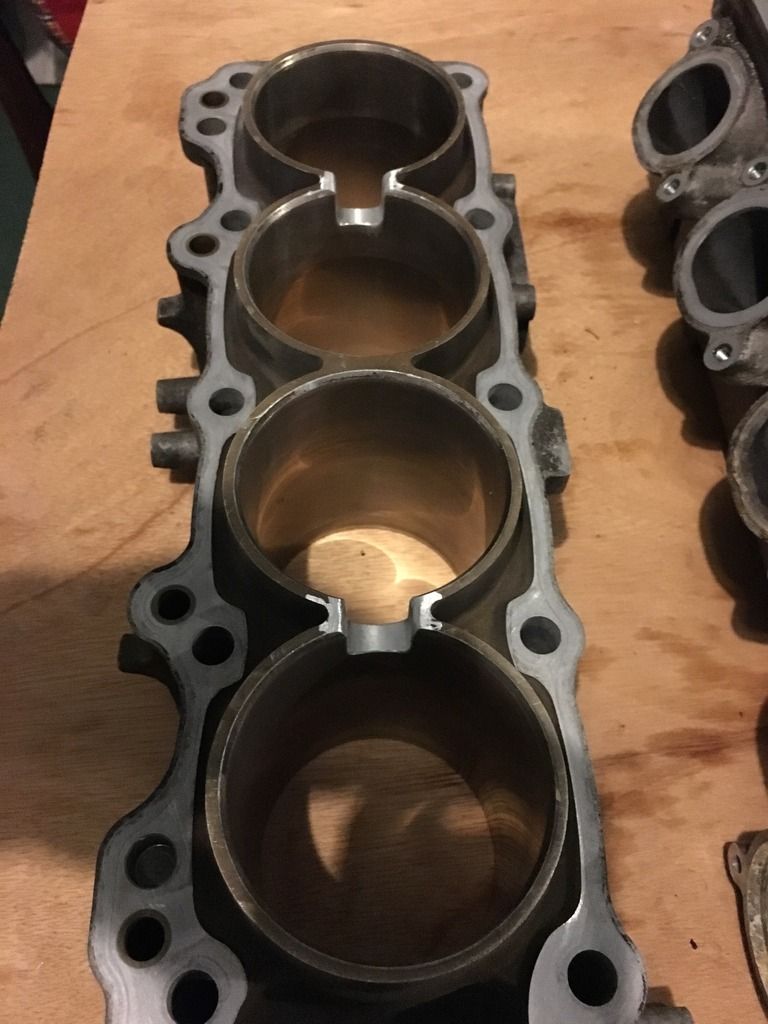
Bores are in really good shape with no marks at all, the slight tide marks will clean off in the paraffin bath no worries.
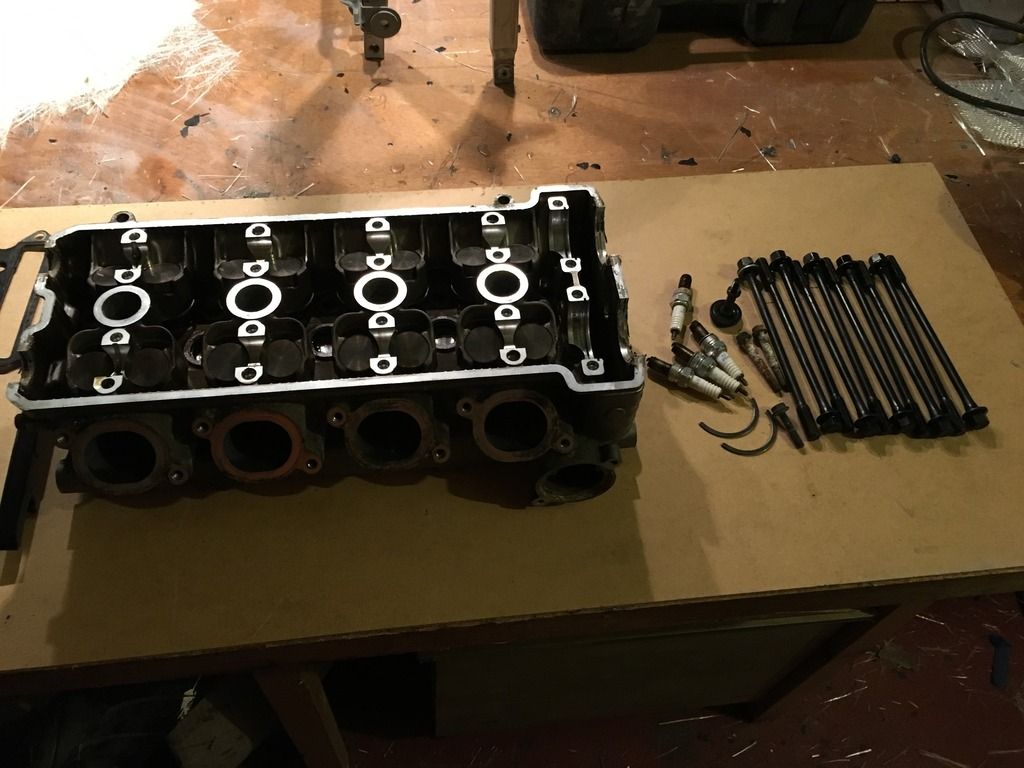
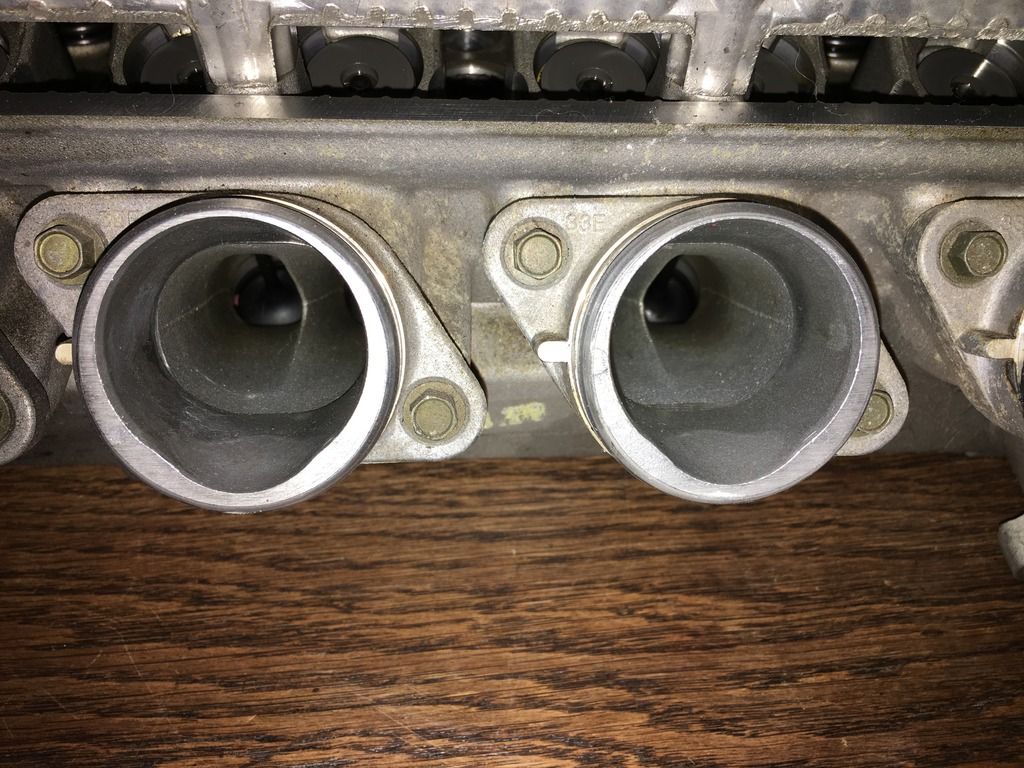
The head looks to be in really good shape, but this wont be going back on the engine after being used for the dry build as I’ve got an FI one to use. These have different inlets stubs that can be flowed into the head. Once all of the work is done to it there will be new stem seals to go in and valves to be lapped in. 2nd picture is the new head and the inlet ports, key for these will be not removing too much material.
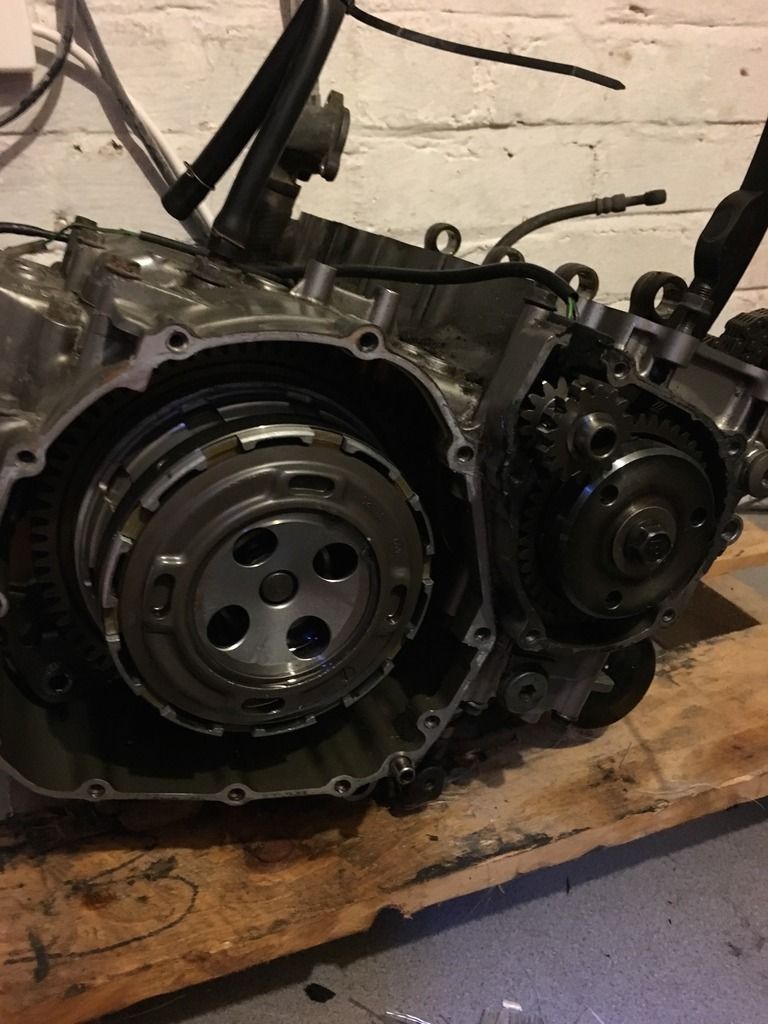
1st eBay bargain found is a new flywheel. The later model (well 2001 is later for this engine, LOL) flywheels where a mod used by 1 of Crescents engine builders as they reduce weight, meaning the engine will spin up quicker. There are 2 different flywheels for the SRAD, 1 for carb’d motors and 1 for efi. Carb’d weighs 1133g, efi weighs 1067g and the K1 1000 version is only 774g, saving 359g over the 1 that’s come off. Result! We can compare the dyno graphs to see if there is any measurable difference in time to spin up, but so many other factors can affect that it may be worthless looking at it.
Clutch will be coming out as ive got a Factory Pro shift spring, never had any problems but while im taking shit apart may as well do it!
Pistons have also come off, remembered to mark them so they go back in the same place! Bit of a clean up and check the rings are still in spec will be all that happens to them, unless eBay turns up a billet set before I’m at that point….
The barrels have had their bottoms machined, this was something the works engines of the era had done and later engines have similar recesses to aid the air flow. Have left plenty of meat so there is no danger of the compromising the water jacket. Possibly will be boring out the crank case breather to help the air flow even more, these engines do like to build pressure.
New head just needs stripping then it will go away with the valves for ultrasonic cleaning and bead blasting the heads to make as good as new. Then I can get busy with the sanding drums……….
Once that’s been sent away, and the pistons have been cleaned up, I’ll be dry building it back up with the old gaskets and head to measure how much I can skim off the barrels. If the top of the barrels are perfectly flat and level the bottom will be skimmed to remove the risk of chipping the nikasil lining of the barrels. To measure how much can safely be removed I’ll put a ring of solder around the piston when assembling the engine, turn over the engine until there is little to no resistance from the solder being compressed then measure at 4 points and take the average reading.
Progress may be slow on this, but my aim is to have it in and running by the summer for a few late season days as I did last year.
We’ve got to a good point with the current motor having fitted a large volume air tray that uses the bottom of the tank as the lid. Different air tubes to help get the air in as quickly as possible also help out. Most recently I’ve tried 3 different configurations of velocity stacks, these should come into play more with a worked motor!
So the plan with this motor is to convert it and tweak a few bits while I’m at it……..
Going for a mild tune.
• High lift cams, degreed in
• Skimmed head and barrels to get the compression up a bit
• Hopefully Ti bits into the valve area…..
• Machine work to some of the casings to help with spin up & overall weight
• Slight port + polish (intake is pretty much perfect, so just a clean and tidy there)
• Replace any worn out/out of spec parts at the same time
I’m hoping to show the tear down, work, rebuild and the final dyno tuning on here, for anyone interested.
This engine was dyno’d at 110bhp, with stock exhaust, K&N filter and different jets in the carbs. The efi engine in the bike now, completely stock innards (3 valve shims changed to bring back into spec), put out 128bhp after a full map. This is with a full stainless system, air tray/tubes and PC3.
Throwing it out there now, my aim is 136bhp upwards
Rather dirty, in need of a good clean on the outside for sure! There is anodised gold on there and there will be more once I'm done


A few bolts later and pistons are hanging out the top of the engine, intentionally though……

You can see a round indentation on the back of the cam chain guide, from the tensioner, meaning the guide will need replacing because this is a weak spot now.
Bores are in really good shape with no marks at all, the slight tide marks will clean off in the paraffin bath no worries.

The head looks to be in really good shape, but this wont be going back on the engine after being used for the dry build as I’ve got an FI one to use. These have different inlets stubs that can be flowed into the head. Once all of the work is done to it there will be new stem seals to go in and valves to be lapped in. 2nd picture is the new head and the inlet ports, key for these will be not removing too much material.


1st eBay bargain found is a new flywheel. The later model (well 2001 is later for this engine, LOL) flywheels where a mod used by 1 of Crescents engine builders as they reduce weight, meaning the engine will spin up quicker. There are 2 different flywheels for the SRAD, 1 for carb’d motors and 1 for efi. Carb’d weighs 1133g, efi weighs 1067g and the K1 1000 version is only 774g, saving 359g over the 1 that’s come off. Result! We can compare the dyno graphs to see if there is any measurable difference in time to spin up, but so many other factors can affect that it may be worthless looking at it.
Clutch will be coming out as ive got a Factory Pro shift spring, never had any problems but while im taking shit apart may as well do it!

Pistons have also come off, remembered to mark them so they go back in the same place! Bit of a clean up and check the rings are still in spec will be all that happens to them, unless eBay turns up a billet set before I’m at that point….

The barrels have had their bottoms machined, this was something the works engines of the era had done and later engines have similar recesses to aid the air flow. Have left plenty of meat so there is no danger of the compromising the water jacket. Possibly will be boring out the crank case breather to help the air flow even more, these engines do like to build pressure.

New head just needs stripping then it will go away with the valves for ultrasonic cleaning and bead blasting the heads to make as good as new. Then I can get busy with the sanding drums……….
Once that’s been sent away, and the pistons have been cleaned up, I’ll be dry building it back up with the old gaskets and head to measure how much I can skim off the barrels. If the top of the barrels are perfectly flat and level the bottom will be skimmed to remove the risk of chipping the nikasil lining of the barrels. To measure how much can safely be removed I’ll put a ring of solder around the piston when assembling the engine, turn over the engine until there is little to no resistance from the solder being compressed then measure at 4 points and take the average reading.
Progress may be slow on this, but my aim is to have it in and running by the summer for a few late season days as I did last year.


